HENMAN GUITARS
ROLLA: HOW TO |
This document is also available as a downloadable/printable pdf.
To download - load the rolla How To pdf then choose file—>save page as.
NOTE: ALL THE FOLLOWING INSTRUCTIONS APPLY TO THE ORIGINAL B4 BASS ONLY
‘HOW TO’ INSTRUCTIONS FOR THE NEW ROLLA BASS COMING SOON
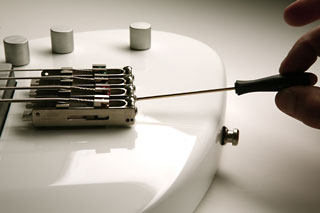
To adjust your B4 action at the bridge
Each B4 is set up with low to medium action at the workshop. If you decide to adjust your action at the bridge point, simply follow these steps to dial in your string arch as you wish. Each string has its own independent through the body bridge.
To adjust your bridge action take your supplied 5/64 allen driver.
1. Insert driver into the desired bridge hole
2. To raise the bridge turn counter clock wise
3. To lower the bridge turn clock wise
4. Adjust each one as simultaneously as possible while keeping an eye on the bridge so it is level.
5. After all your heights are set snug up all the screws.
STEP #1
ADJUST ONE STRING AT A TIME
LOW “E” STRING - BACK PART OF THE BRIDGE
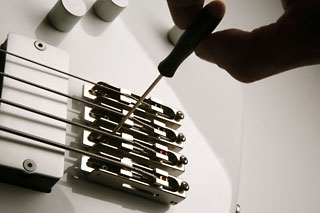
STEP #2
FRONT PART OF THE BRIDGE
INTONATION AND BRIDGE ADJUSTMENTS
(***NOTE: APPLIES TO ORIGINAL B4 BASS ONLY)
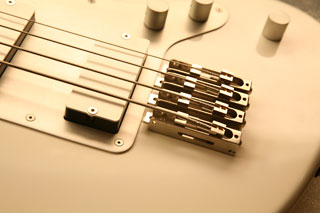
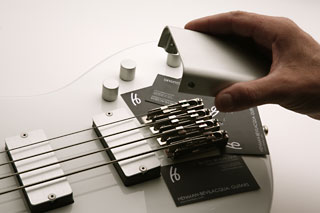
Each string has its own individual through the body bridge.
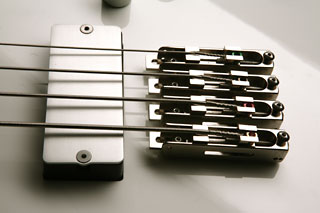
VIEW OF INDIVIDUAL BELL BRASS NICKLE PLATED BRIDGES WITHOUT THE ASHTRAY COVER.
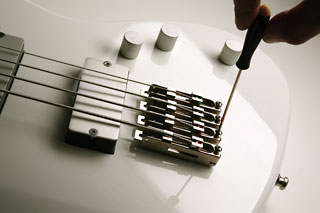
TO LOCK DOWN YOUR FINE TUNER, USE THE 5/64 ALLEN DRIVER FROM YOUR TOOL KIT. THIS STEP IS DONE AFTER YOU ARE FULLY INTONATED. TURN CLOCKWISE TO JUST SNUG UP THE SCREW. DO NOT OVER TIGHTEN.
TO ADJUST THE FINE TUNER, TAKE YOUR 5/64 ALLEN DRIVER AND POSITION THE BALL HOOK A LITTLE OVER HALFWAY BETWEEN ITS ADJUSTMENT.
TO ADJUST YOUR INTONATION, IF YOU DECIDE TO CHANGE TO A LARGER STRING GAUGE: TAKE YOUR 5/64 ALLEN DRIVER AND SLIGHTLY LOOSEN THE SCREW, SO THE INTONATOR CAN SLIDE. THEN, WHEN YOUʼRE DEAD ON PITCH, TIGHTEN THE SCREW NICE AND SNUG, SO IT WONʼT RATTLE WHEN YOU THOMP ON IT.
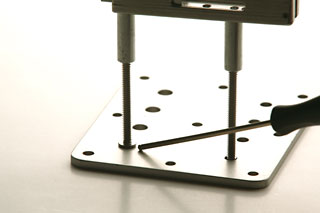
An inside look at the physics of the individual through the body bridges system
(***NOTE: APPLIES TO ORIGINAL B4 BASS ONLY)
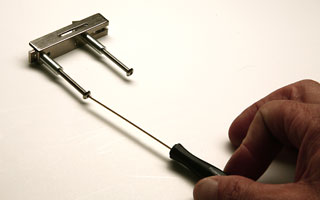
This is the front of the bridge adjustment screw.
It presses on the inside of the bridge plate and forces the front to raise.
Side view.
This is the back screw - it forces the back of the bridge to raise.
Notice the back screw is fed from the outside (right) and the front screw is fed from the inside (left). The bridge plate acts as a force plate to counteract the adjustment and allows the player to separately adjust the action of each string.
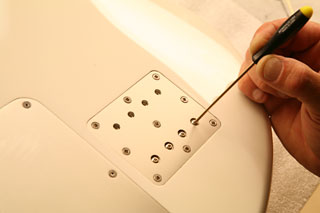
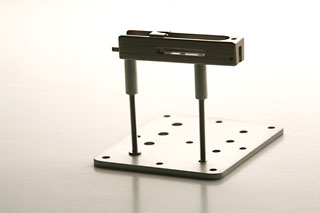
To adjust the truss rod system
Itʼs unlikely you will need to adjust your truss rod, as it is set at the workshop and can stay locked in for years to come. On occasion during global shipping from one climate to another the neck may move on its own due to Mother Nature. If she decides to move the water molecules around in the wood simply follow these simple steps to accommodate her.
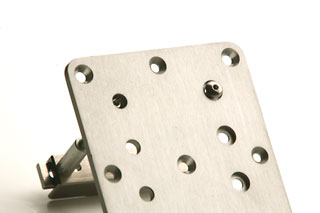
1. Take a #3 fat tip Phillips screw driver (not included) and unscrew the center plug. This is just a cover for the hole.
2. DO NOT touch the other 4 screws, they are there to keep the neck on.
3. Place your screws far to the side.
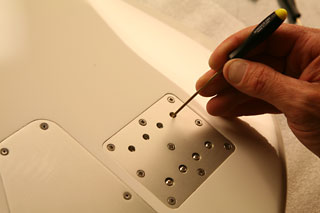
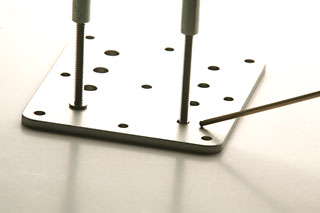
Take your 5/32 allen driver from your supplied tool kit.
4. With some good light take a peak into the hole and you will see an allen head screw about 1 inch deep.
5. Insert your driver into the hole carefully and put a little force on it as you are wiggling the driver so that you can feel it slip into the allen head. You’ll know when it slips it.
6. DO NOT turn the driver more than 1 full turn from its natural position.
7. Forward bow turn clock wise
8. Backward bow turn counter clock wise
9. Neck adjustments MUST be done while the instrument is under string tension and in tune.
10. You may have to wiggle the drive a little when pulling it out of the hole.
11. Re insert your #3 phillips screw plug and only tighten snug. DO NOT over tighten to prevent cracking the paint around the countersink hole.
STEP #1
unscrew the center plug
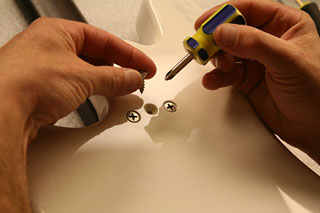
STEP #2
REMOVE CENTER PLUG
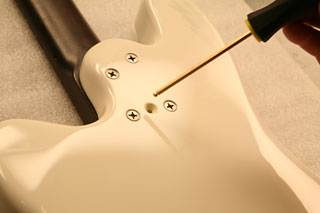
STEP #3
CAREFULLY INSERT DRIVER
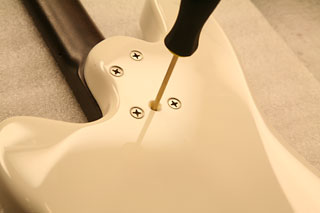
STEP #4
PUSH DOWN A LITTLE AND FEEL IT LOCK IN
HOW THE ‘STRESS FREE’ TRUSS IS ASSEMBLED
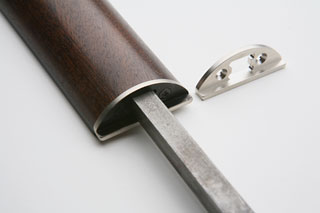
This is a look at the “Stress Free” truss bar and the solid bell brass nut mount.

The truss bar is epoxied into the headstock to absorb string tension.
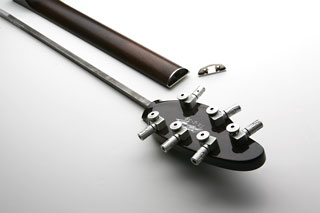
Trussbar and headstock separate from the neck and nut mount.
WHAT IS THAT HOLE DOING IN THE NECK?
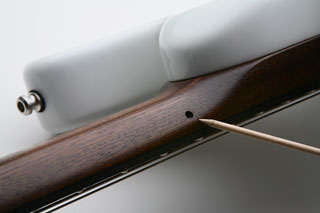
This is the pin hole and is AN ESSENTIAL part of the neck assembly. This hole has NO user function and should not be touched.
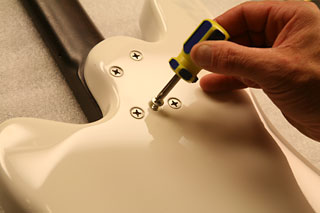
REMOVING PICKUP COVERS
(***NOTE: APPLIES TO ORIGINAL B4 BASS ONLY)
ROLLA BRIDGES WITH PICKUP COVERS ON

STEP #1
PRESS WITH FINGER DOWN SLIGHTLY
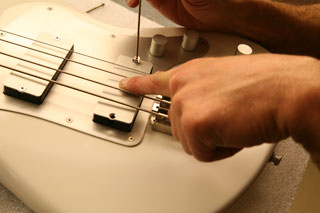
STEP #2
LOOSEN SCREW CAREFULLY
STEP #3
REMOVE SCREW
STEP #4
HOLD PICKUP WHILE PRESSING
STEP #5
SLIDE OUT COVER
STEP #6
INSERT SUPPLIED SOCKET SCREWS
STEP #7
HOLD DOWN AND INSERT SCREW

With pickup cover off
SAVE YOUR SCREWS IN CASE YOU DECIDE TO REPLACE THEM.
REMOVING THE ROLLA BASS BRIDGE COVER (”ASHTRAY”)
(***NOTE: APPLIES TO ORIGINAL B4 BASS ONLY)
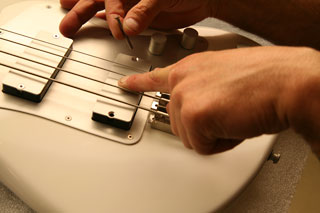
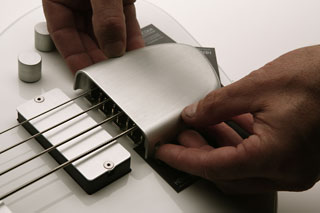
As part of our design that we love so much, we have our own custom bridge covers machined from a solid block of 6061 aluminum. They are designed to fit tightly onto the two end bridges. The two reasons you would have to remove your ashtray are: To change the strings, or you choose not to have it on at all. Generally, most players that “palm rest” their right hand while playing decide to remove the cover. Those that “thumb rest” their right hand, leave it in place. To remove it, please follow these step by step instructions very carefully to prevent any damage to the finish of your ROLLA.
A personal note from the builder—“the procedure is a little tricky the first time around.”
The cover fits over the bridges very snugly to prevent unwanted vibrations. Feel free to call for guidance if you’re having any trouble. 760-277-8781.
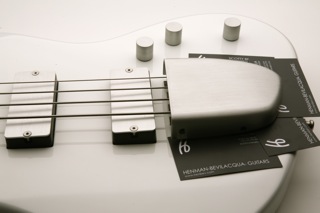
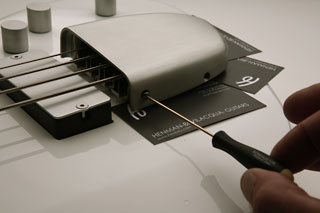
STEP #1
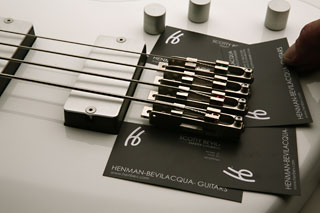
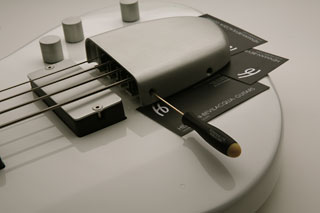
Place a layer that has a ‘no scratch’ surface, like business cards, and lay them under and around the raised bridge sections to protect the finish.
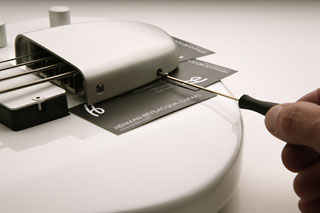
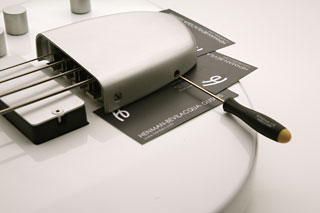
STEP #2
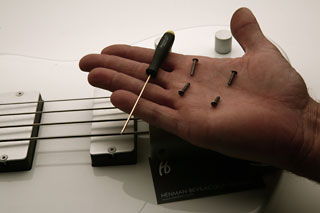
TAKE YOUR 1/16 ALLEN DRIVER OUT OF YOUR TOOL KIT AND UNSCREW THE 4 SCREWS. PLACE THESE IN A SMALL ZIP LOCK BAG ALONG WITH YOUR ASH TRAY IN CASE YOU CHOOSE TO REPLACE THE COVER.
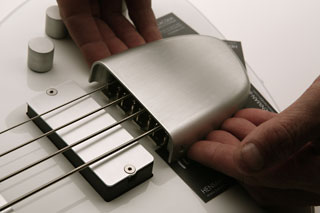
STEP #3
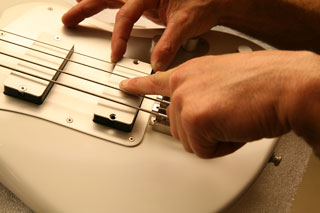
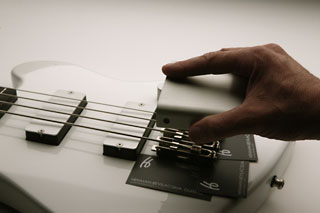
Carefully use your fingers and try to get underneath to get a grip.
STEP #4
Use your thumbs for support.
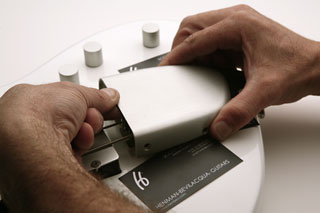
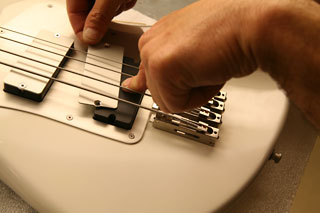
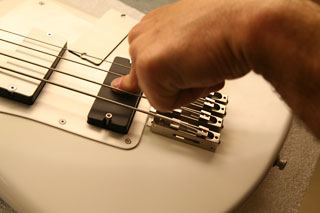
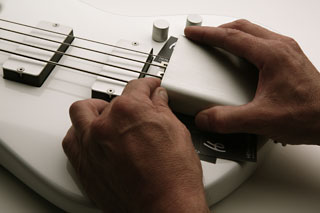
STEP #5
Here is the MOST IMPORTANT step. Since the cover is on snugly, you may have to wiggle it back and forth while at the same time pulling up. DO NOT LET THE ASHTRAY EVER TOUCH THE PROTECTIVE LAYER (BUSINES CARDS). IF YOU DO TOUCH DOWN ON THE SURFACE, DO NOT PRY ON IT. Take off as level as possible, while taking a deep breath and taking your time.

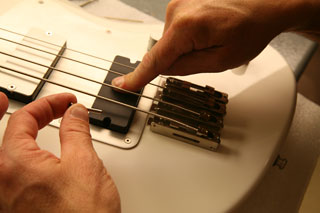
STEP #6
Gently pull up while making sure you have a good hold onto it.
STEP #7
Wrap up your ashtray in a soft cloth, place it in a bag along with the screws and store it in case you decide to put it back on at a later date.
INSTALLING THE ROLLA BASS BRIDGE COVER (”ASHTRAY”)
(***NOTE: APPLIES TO ORIGINAL B4 BASS ONLY)
STEP #1
Place a layer that has a ‘no scratch’ surface, like business cards and lay them under and around the raised bridges to protect the finish.
STEP #2
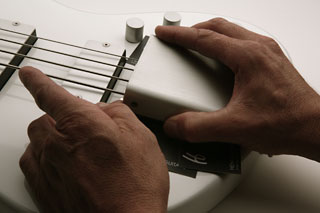
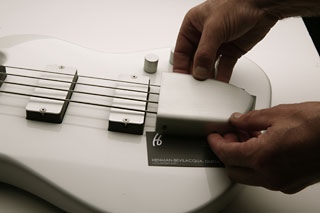
WITH A GOOD GRIP IN YOUR PALM…
STEP #3
LINE UP THE FRONT EDGE OF THE COVER TO THE FRONT EDGE OF THE BRIDGE.
STEP #4
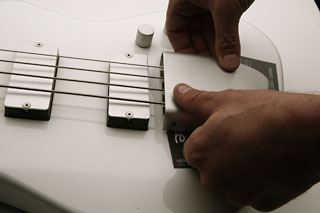
START WITH THE BACK AND SLOWLY PRESS DOWN.
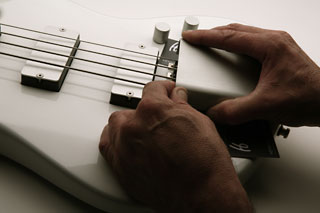
STEP #5
WHILE KEEPING BOTH HANDS ON THE COVER, WIGGLE IT INTO PLACE.
STEP #6
PRESS DOWN WHILE LOOKING INTO THE SCREW HOLE AND LINE IT UP WITH THE HOLE IN THE SIDE OF THE BRIDGE.
STEP #7
GET IT AS CLOSE AS YOU CAN WITH YOUR EYE. MAKE SURE NOT TO TO TOUCH THE PROTECTIVE LAYER.
STEP #8
TAKE YOUR 4 SCREWS. THE LONGER PAIR GO IN THE FRONT AND THE SHORTER GO IN THE BACK.
STEP #9
WITH YOUR 1/16 ALLEN DRIVER LINE UP THE FRONT HOLE FIRST.
STEP #10
INSERT LONGER SCREW. IT SHOULD GO IN EASY. IF NOT, STOP AND MAKE SURE YOUʼRE GOING IN STRAIGHT TO THE TAPPED HOLE IN THE BRIDGE. DO NOT OVER TIGHTEN.
STEP #11
ALIGN THE BACK SCREW HOLE AND INSERT SMALLER SCREW AND REPEAT ON THE OTHER SIDE.

STEP #12
INSERT YOUR BACK SMALLER SCREW. TO GET ALL FOUR SCREWS TO LINE UP, ITʼS BETTER TO LEAVE THEM ALL A LITTLE LOOSE UNTIL YOU GET THEM ALL MOST OF THE WAY IN. THEN YOU CAN ADJUST IT INTO THE EXACT POSITION. FINALLY, JUST SNUG THEM UP.
