HENMAN GUITARS
ROCKA: HOW TO |
This document is also available as a downloadable/printable pdf.
To download - load the Rocka How To pdf then choose file—>save page as.
PICKUP SELECTION SWITCH
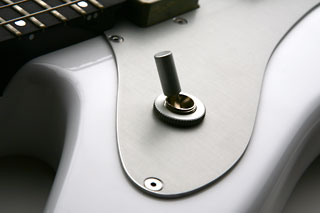
BRIDGE POSITION = BACK PICKUP.
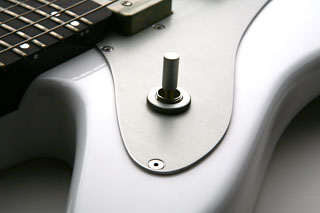
MIDDLE POSITION = BOTH PICKUPS.
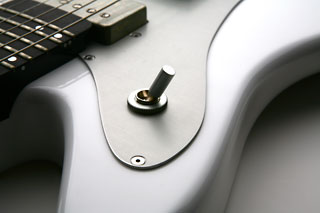
NECK POSITION = FRONT PICKUP.
SINGLE COIL TAP
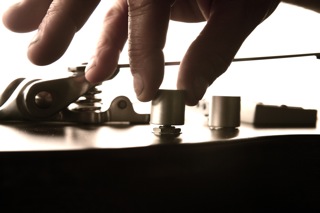
TO SINGLE COIL TAP THE HUMBUCKER “PULL UP”
USING THE SPERZEL TUNER
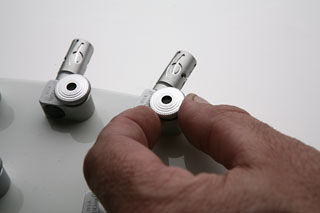
To insert a string, turn the thumb wheel counter-clockwise just a few full turns to loosen up the mechanism. FYI - if you turn it to much, the wheel will come off and a pin will fall out. If so, simply replace the pin and then the wheel.
GUITAR PICKUP HEIGHT ADJUSTMENT
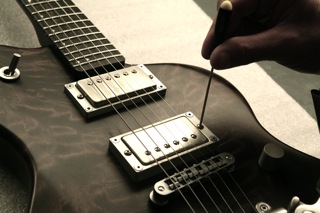
ADJUSTING ON THE PICKUP
TAKE YOUR SUPPLIED 5/32 ALLEN DRIVER
TURN THE CENTER BUTTON HEAD SOCKET CLOCKWISE TO RAISE THE PICKUP
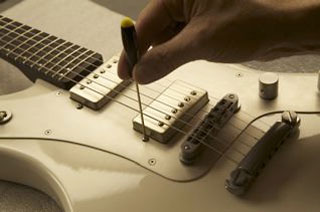
ADJUSTING ON THE PICKGUARD
TAKE YOUR SUPPLIED 5/32 ALLEN DRIVER
TURN THE CENTER BUTTON HEAD SCOKET CLOCKWISE TO RAISE THE PICKUP
To adjust the truss rod system
Itʼs unlikely you will need to adjust your truss rod, as it is set at the workshop and can stay locked in for years to come. On occasion during global shipping from one climate to another the neck may move on its own due to Mother Nature. If she decides to move the water molecules around in the wood simply follow these simple steps to accommodate her.
1. Take a #3 fat tip Phillips screw driver (not included) and unscrew the center plug. This is just a cover for the hole.
2. DO NOT touch the other 4 screws, they are there to keep the neck on.
3. Place your screws far to the side.
Take your 5/32 allen driver from your supplied tool kit.
4. With some good light take a peak into the hole and you will see an allen head screw about 1 inch deep.
5. Insert your driver into the hole carefully and put a little force on it as you are wiggling the driver so that you can feel it slip into the allen head. You’ll know when it slips it.
6. DO NOT turn the driver more than 1 full turn from its natural position.
7. Forward bow turn clock wise
8. Backward bow turn counter clock wise
9. Neck adjustments MUST be done while the instrument is under string tension and in tune.
10. You may have to wiggle the drive a little when pulling it out of the hole.
11. Re insert your #3 phillips screw plug and only tighten snug. DO NOT over tighten to prevent cracking the paint around the countersink hole.
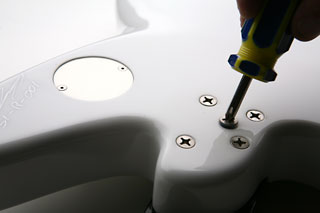
STEP #1
unscrew the center plug
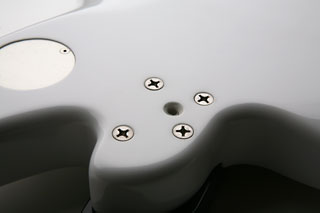
STEP #2
REMOVE CENTER PLUG
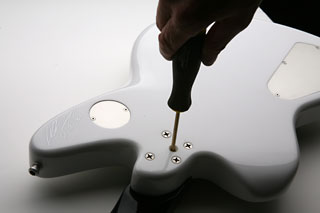
STEP #3
CAREFULLY INSERT DRIVER THEN PUSH DOWN A LITTLE AND FEEL IT LOCK IN
HOW THE ‘STRESS FREE’ TRUSS IS ASSEMBLED
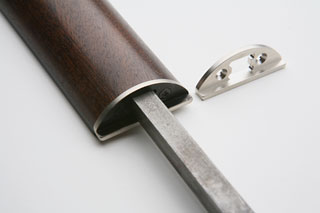
This is a look at the “Stress Free” truss bar and the solid bell brass nut mount.
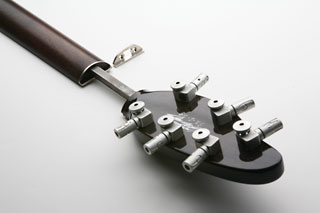
The truss bar is epoxied into the headstock to absorb string tension.
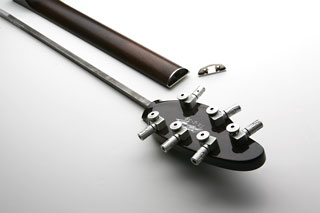
Truss bar and headstock separate from the neck and nut mount.
WHAT IS THAT HOLE DOING IN THE NECK?
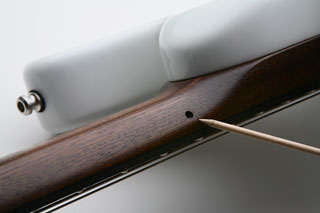
This is the pin hole and is AN ESSENTIAL part of the neck assembly. This hole has NO user function and should not be touched.
